How to Use IPFoxy in MostLogin?


MostLogin is a free anti-detect browser powered by Chrome, Firefox, and Android kernels. It creates isolated browser and cloud phone profiles with unique device fingerprints and clean IPs—effectively preventing multi-account bans without using virtual machines.
The tool offers enterprise-level anti-detection through deep kernel modification for fully independent profiles, along with device fingerprint spoofing across Canvas, WebGL, and audio. It features an open API ecosystem with native Selenium and Puppeteer support for automation and enables bulk operations via RESTful APIs. MostLogin provides transparent pricing: browser profiles are completely free, cloud phones come at below-market rates, and free features include APIs, RPA automation, sync systems, and team collaboration.
IPFoxy provides exclusive proxy solutions for global users, featuring over 50 million clean IPs across 200+ regions. Ideal for data scraping, social media, and ad verification, it ensures high anonymity, reliable speed, and stable connections. It's a cost-effective choice for businesses.
👉
IPFoxy: The Best Enterprise-Grade International Proxy Service Provider
To use IPFoxy proxy in MostLogin,you need the following steps:
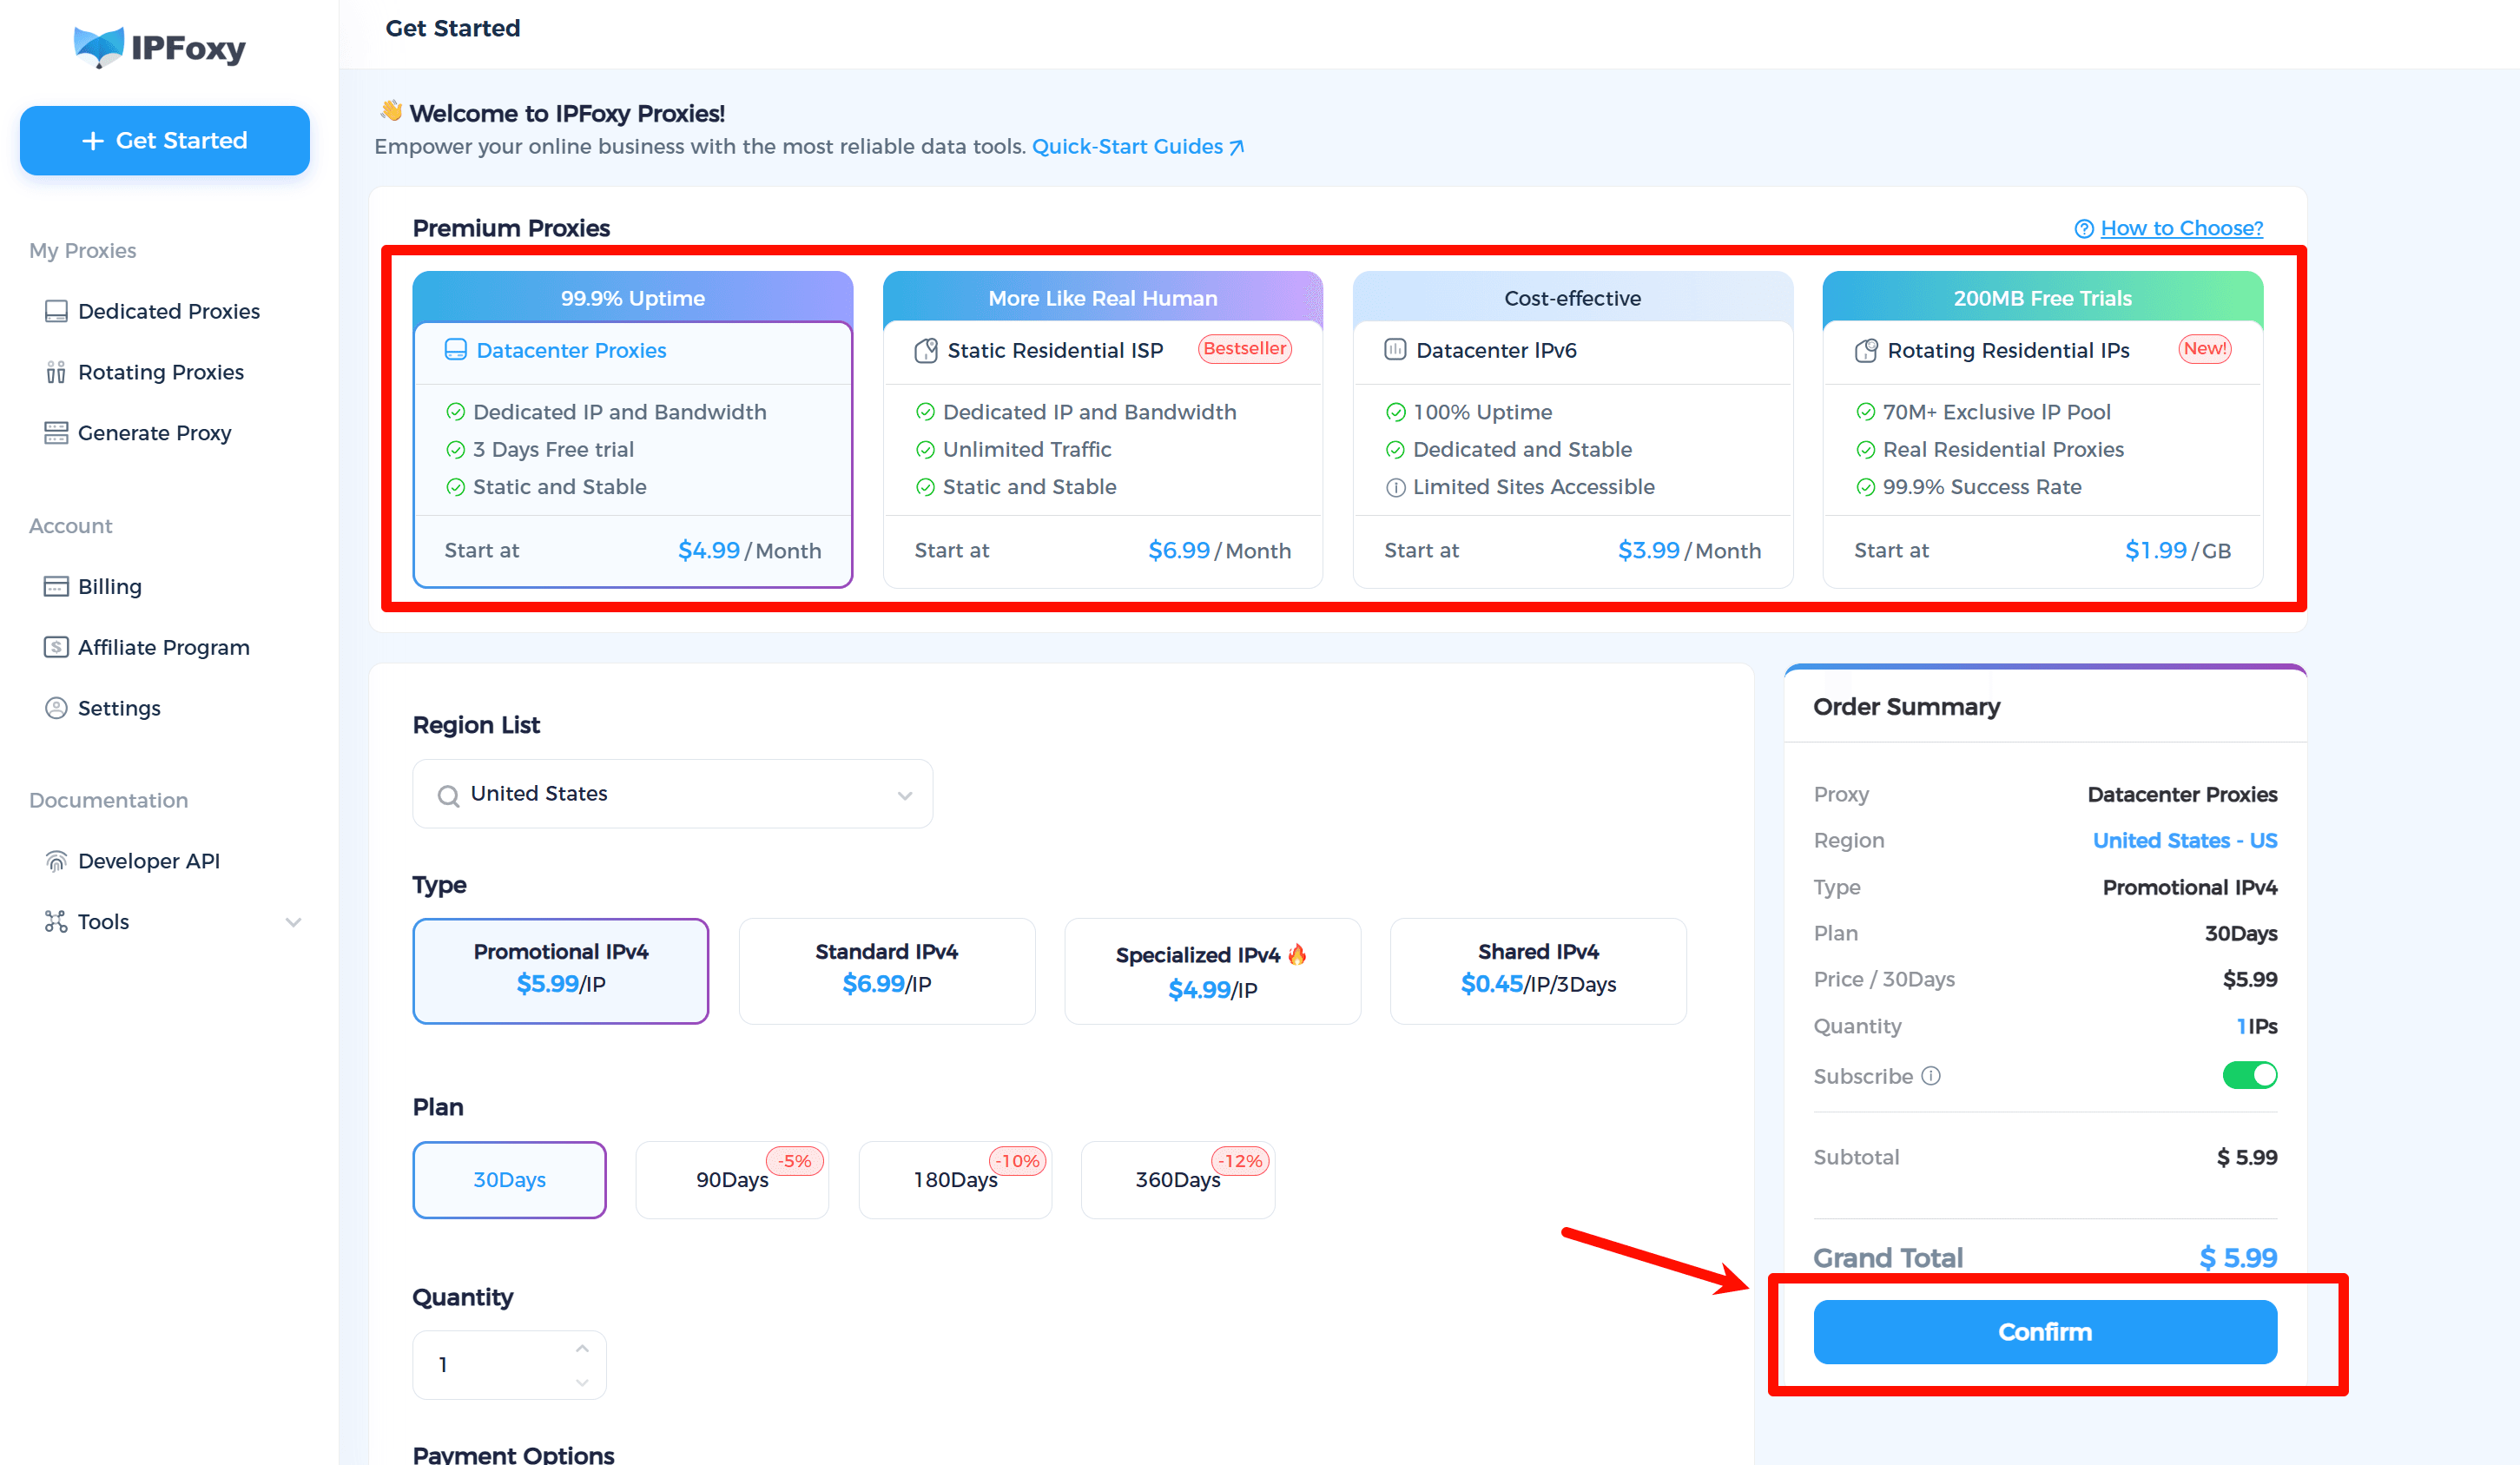
1. Purchase the IPFoxy proxy
2. Copy the proxy information
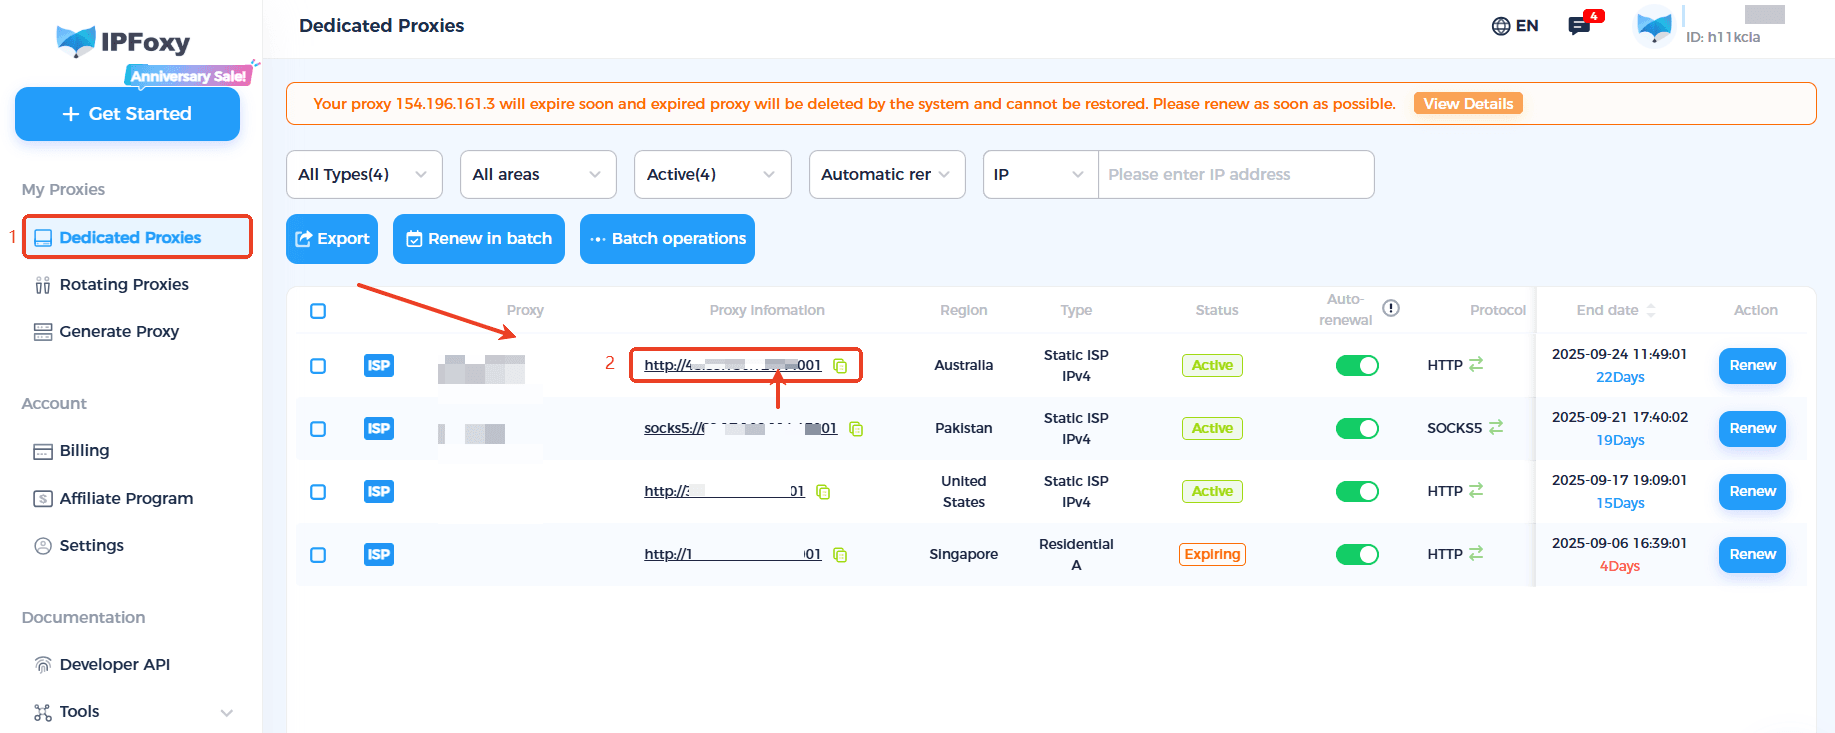
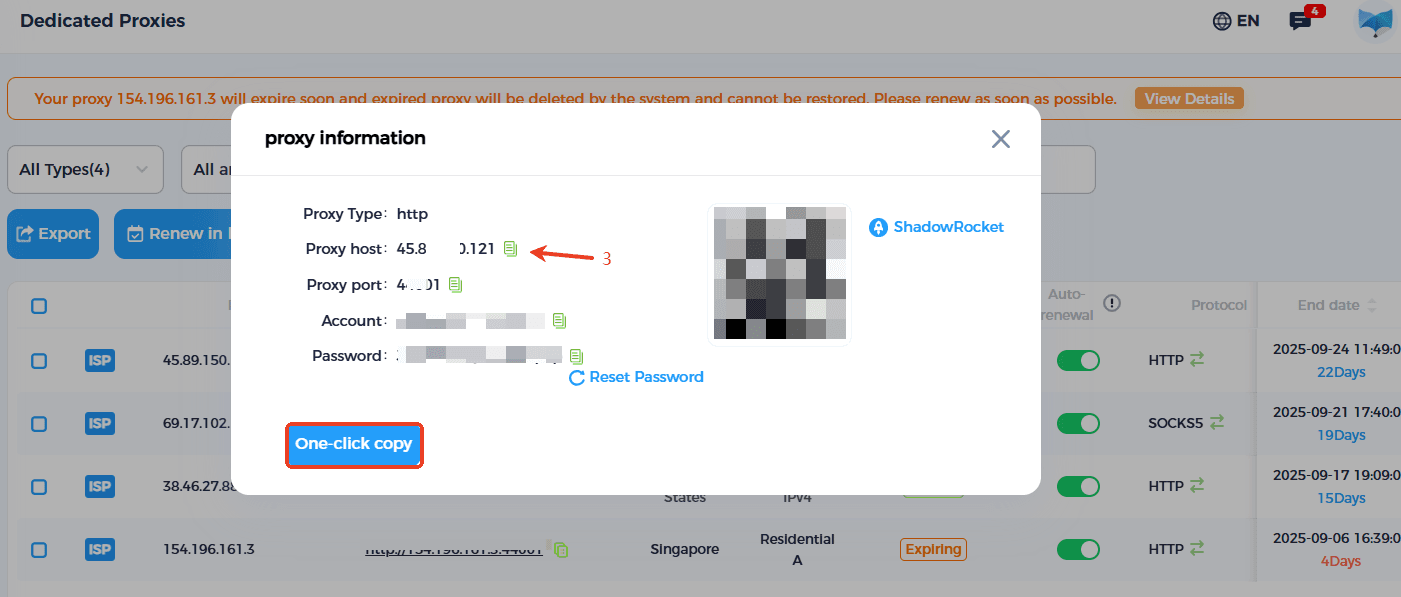
Find the list of purchased proxy types in the left menu bar of IPFoxy, find the purchased proxy and copy the proxy information.
1->If you bought a【Dedicated Proxy】
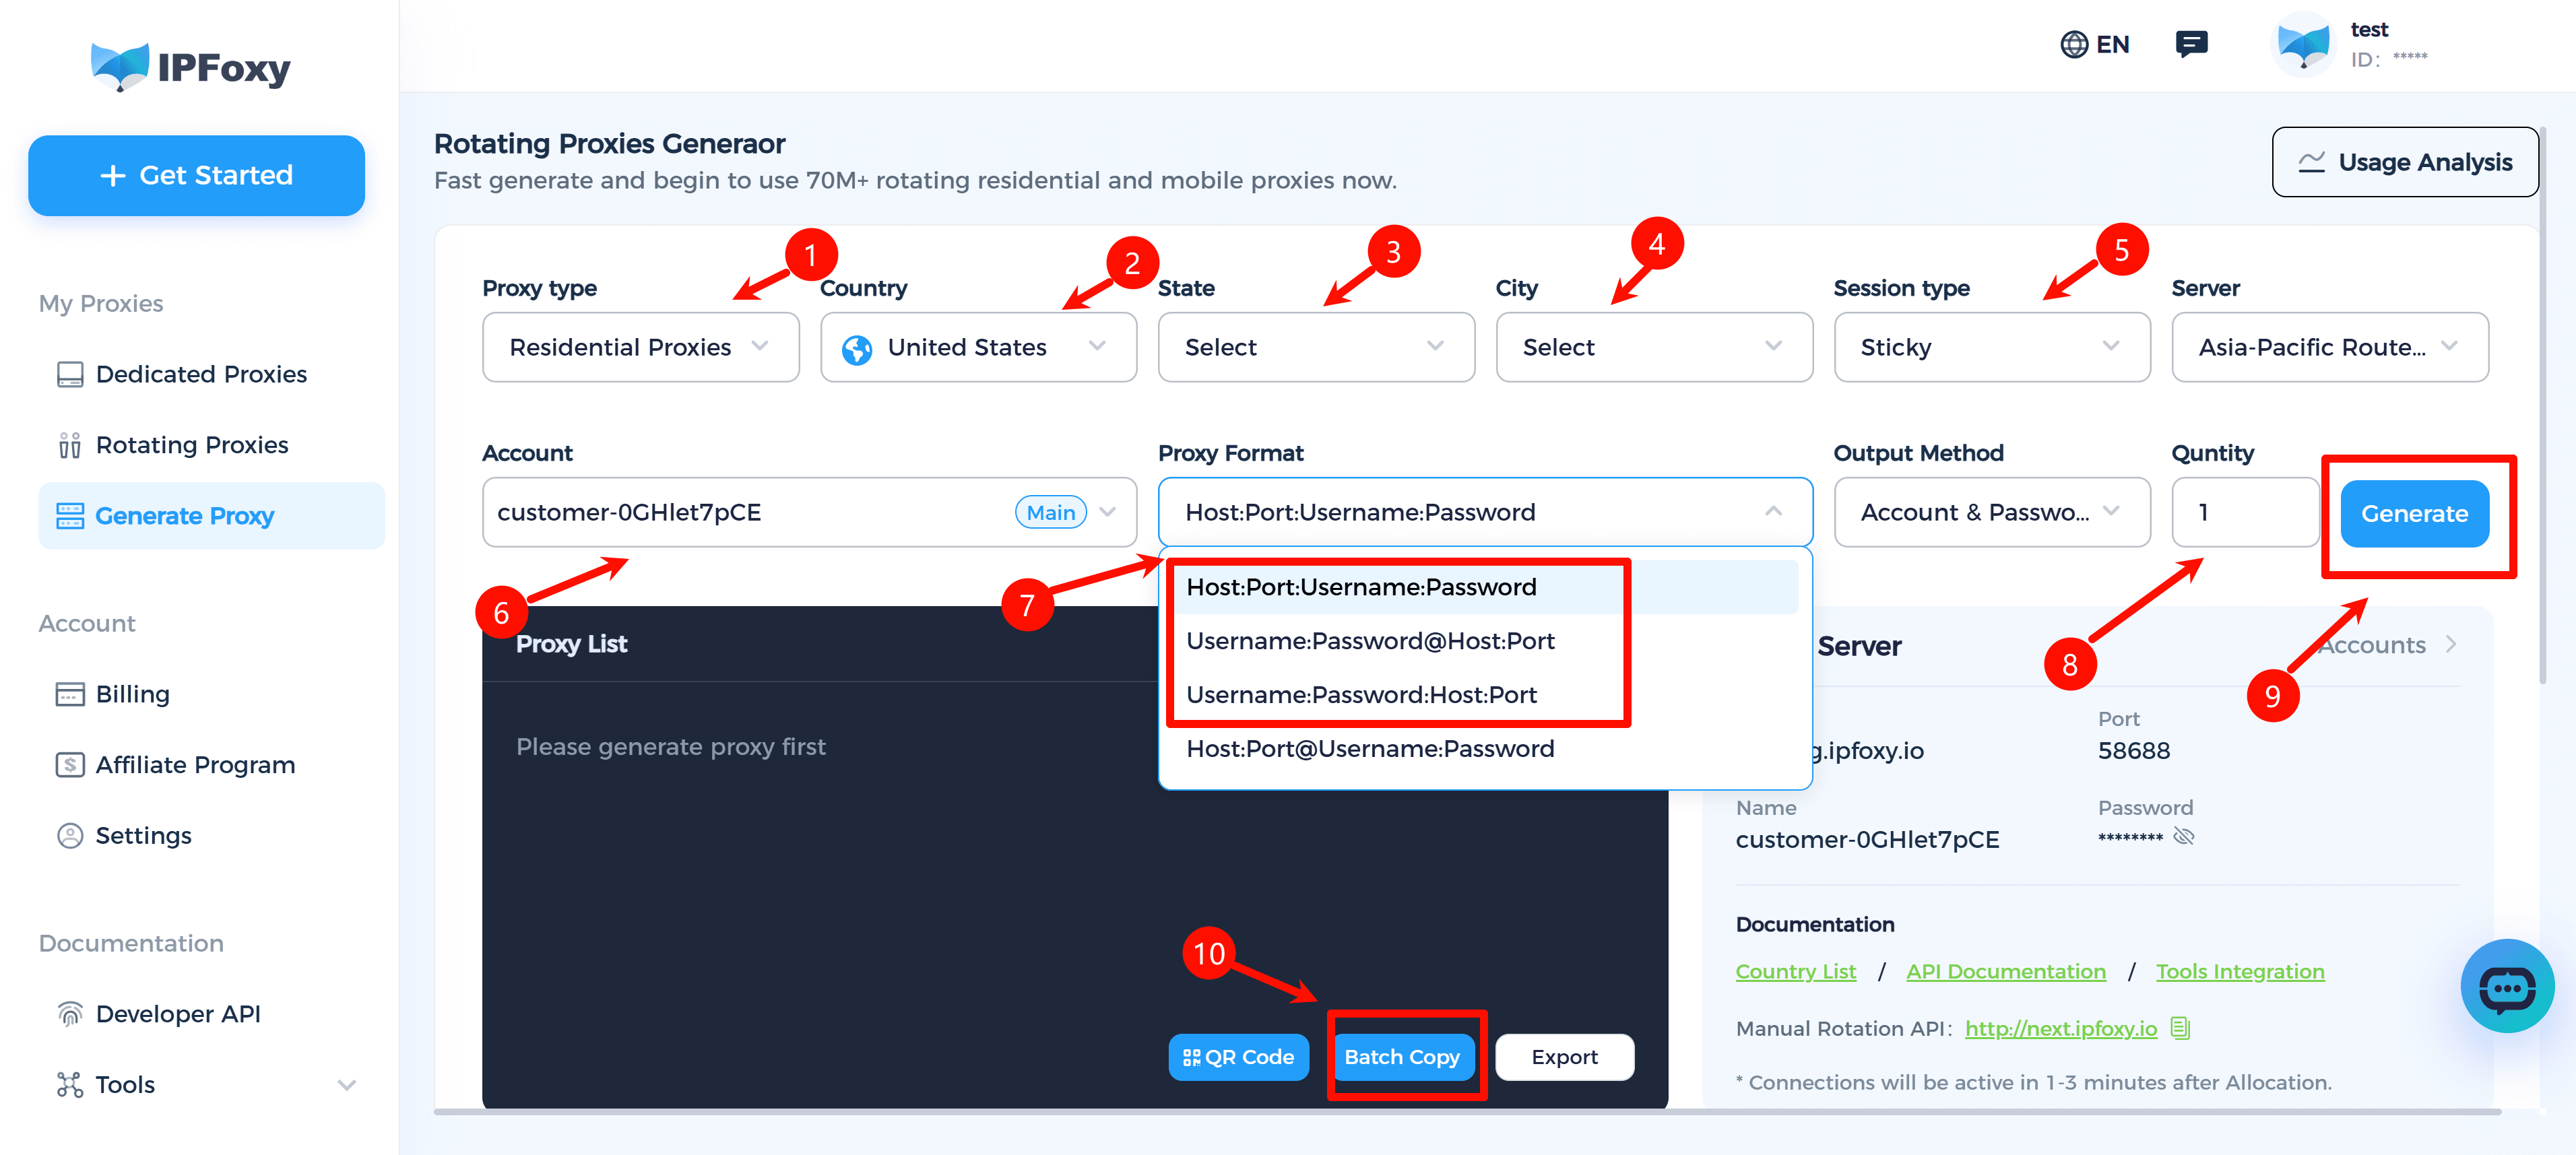
2->If you bought a【Rotating Proxy】
Choose the regions、State、City、Route、Rotation Cycle、Protocol、Format、Quantity,and then generate,you can copy the proxy imformation.
Format preferred [Host:Port:Username:Password]
Specific rotating proxy configuration tutorials : Click it
3. Open MostLogin
Download Hidemyacc software, register in it.
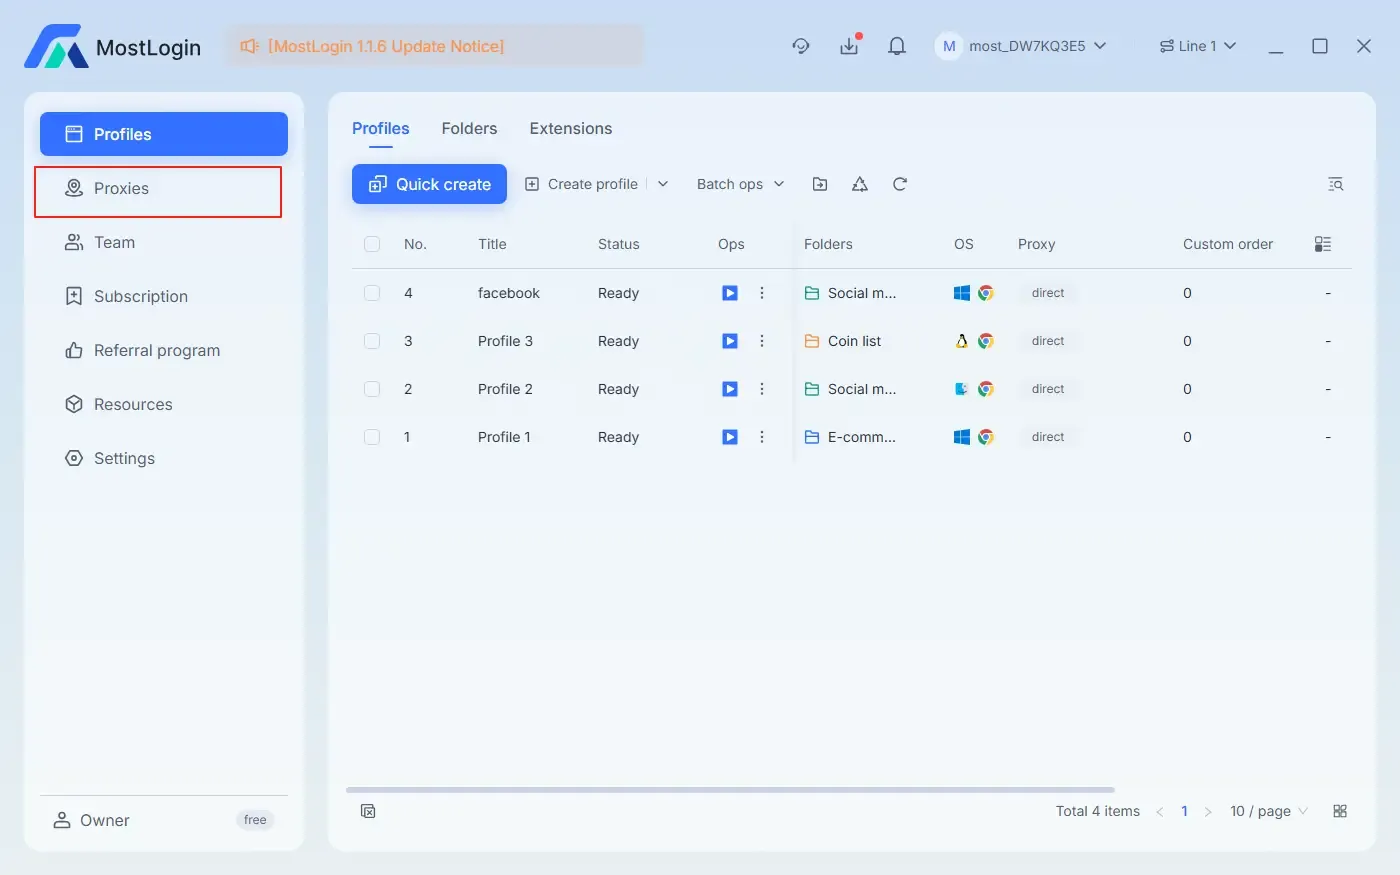
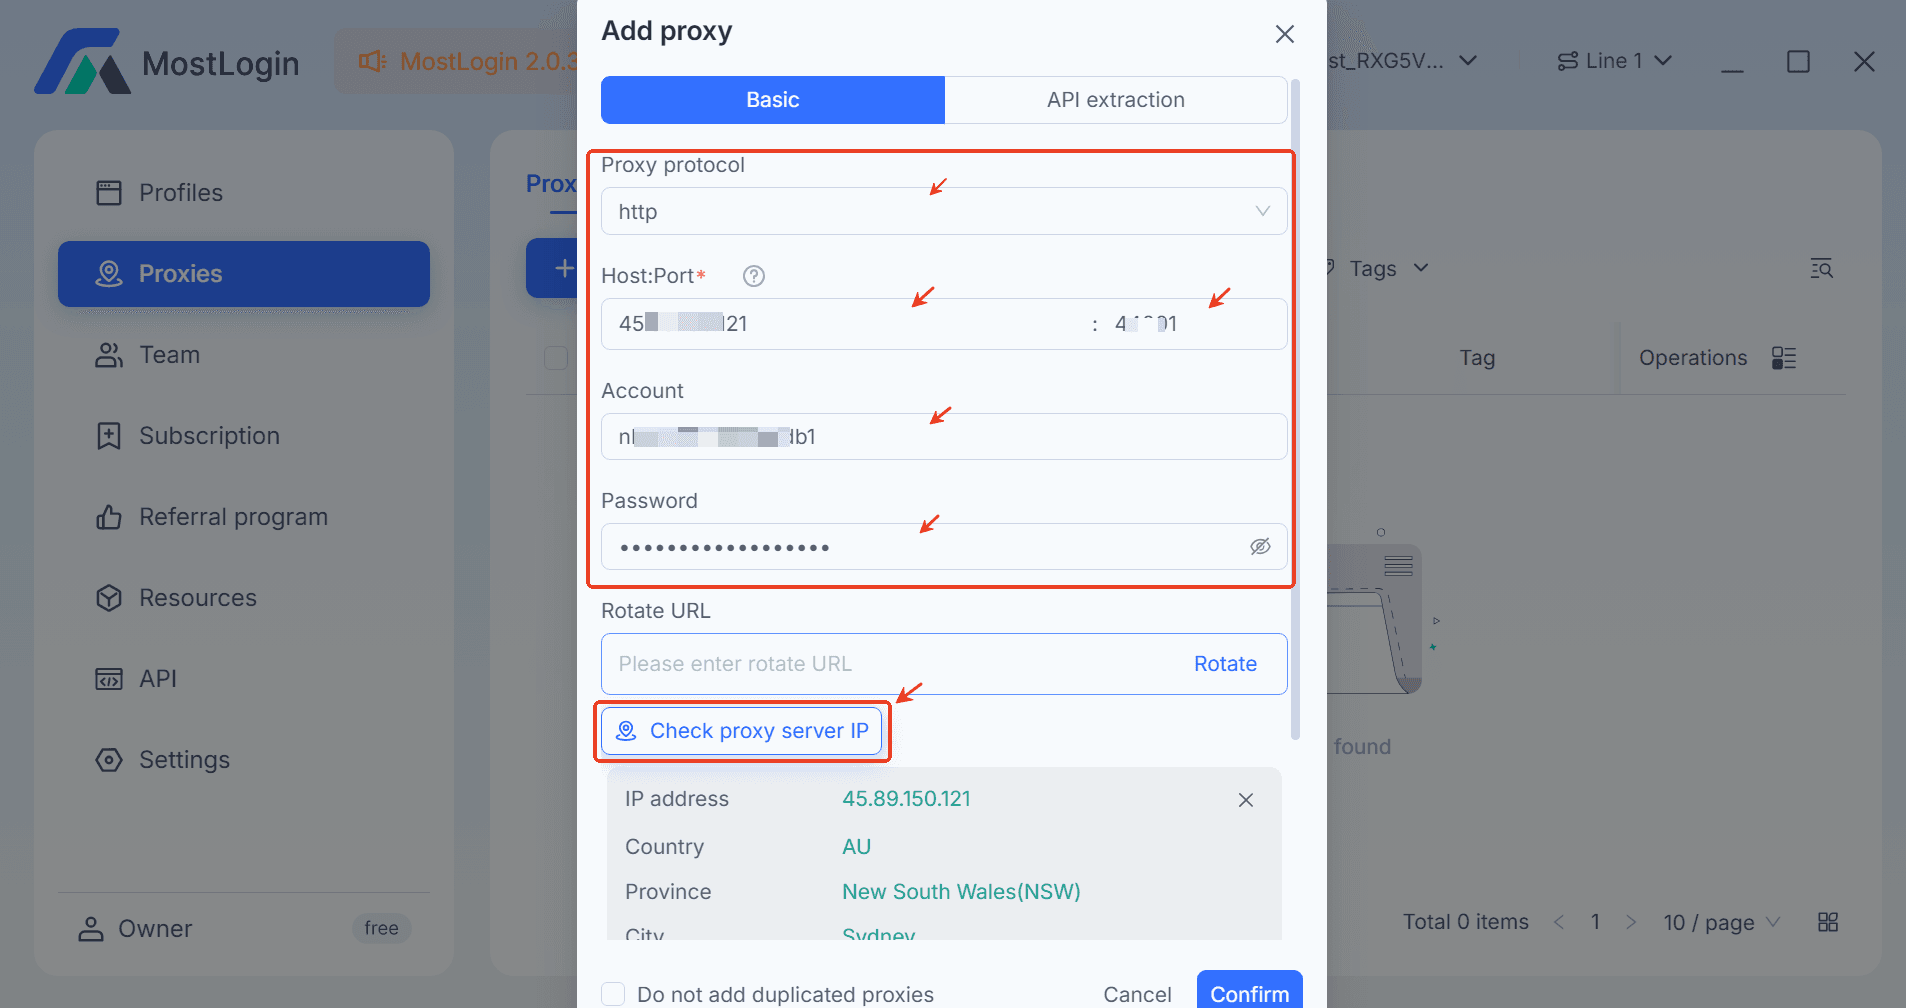
1>Click [Proxies] - [Add Proxy]

2> Paste the proxy information you just copied from IPFoxy to the Bsaic Proxy setting,including Proxy protocol,Host,Port,and account&password.
3> Then Cilk proxy sever IP,If the check is passed, click 'Confirm' to save.
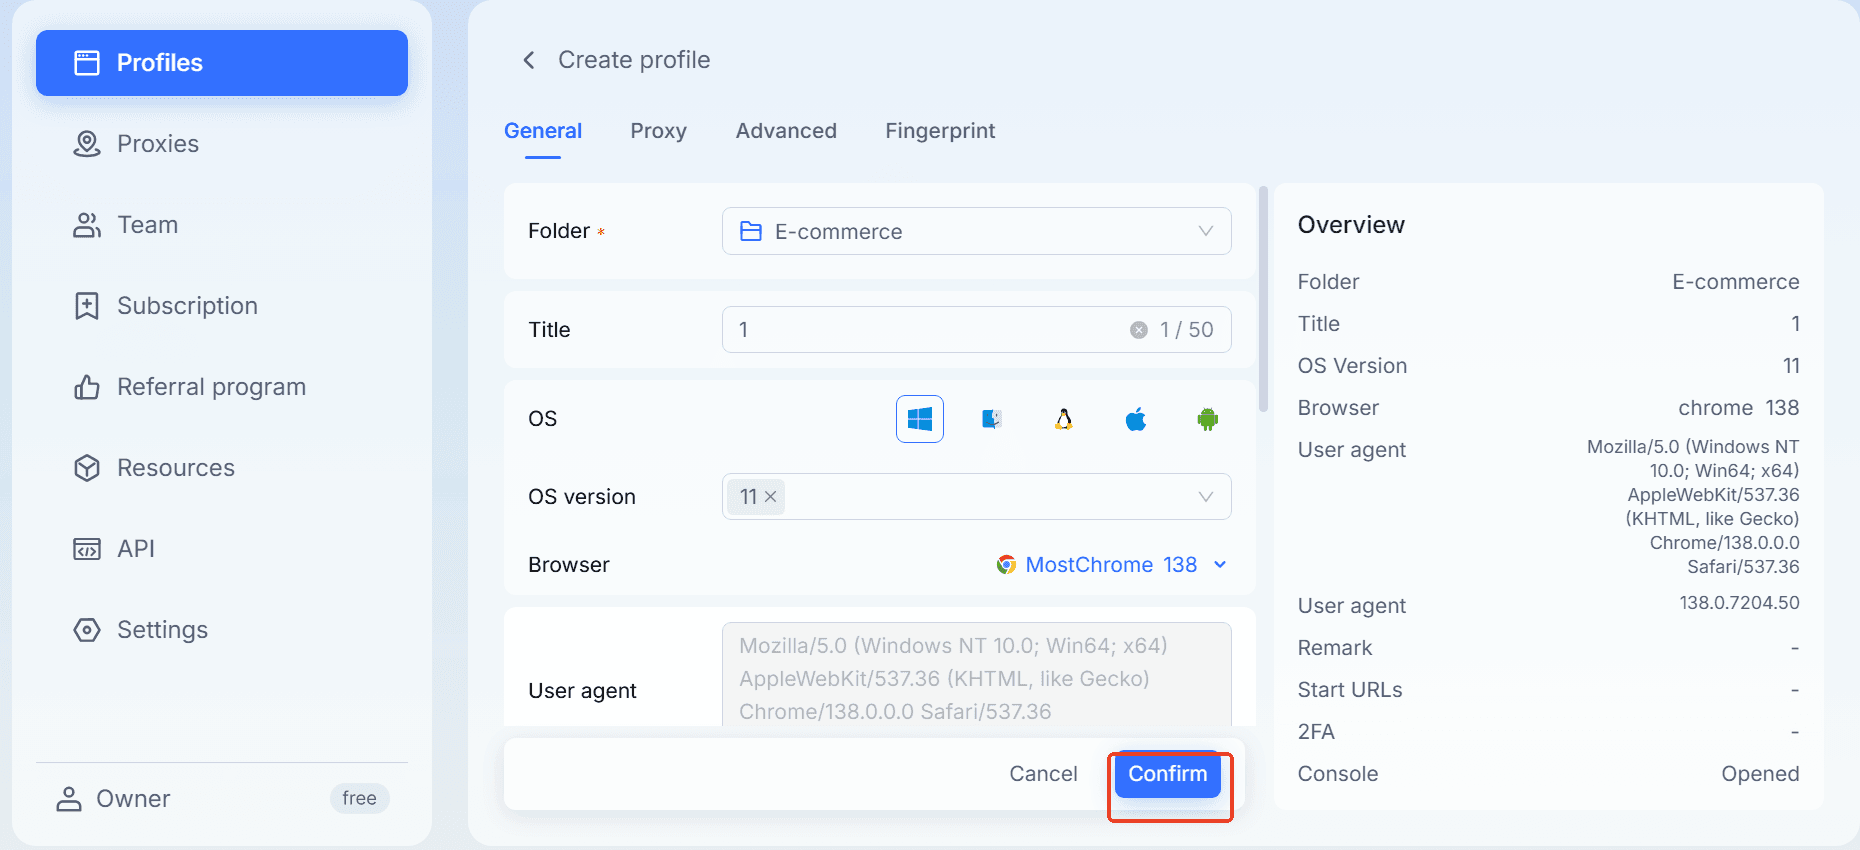
4>Click [Profiles]-[Create profile],Select [proxy] setting.
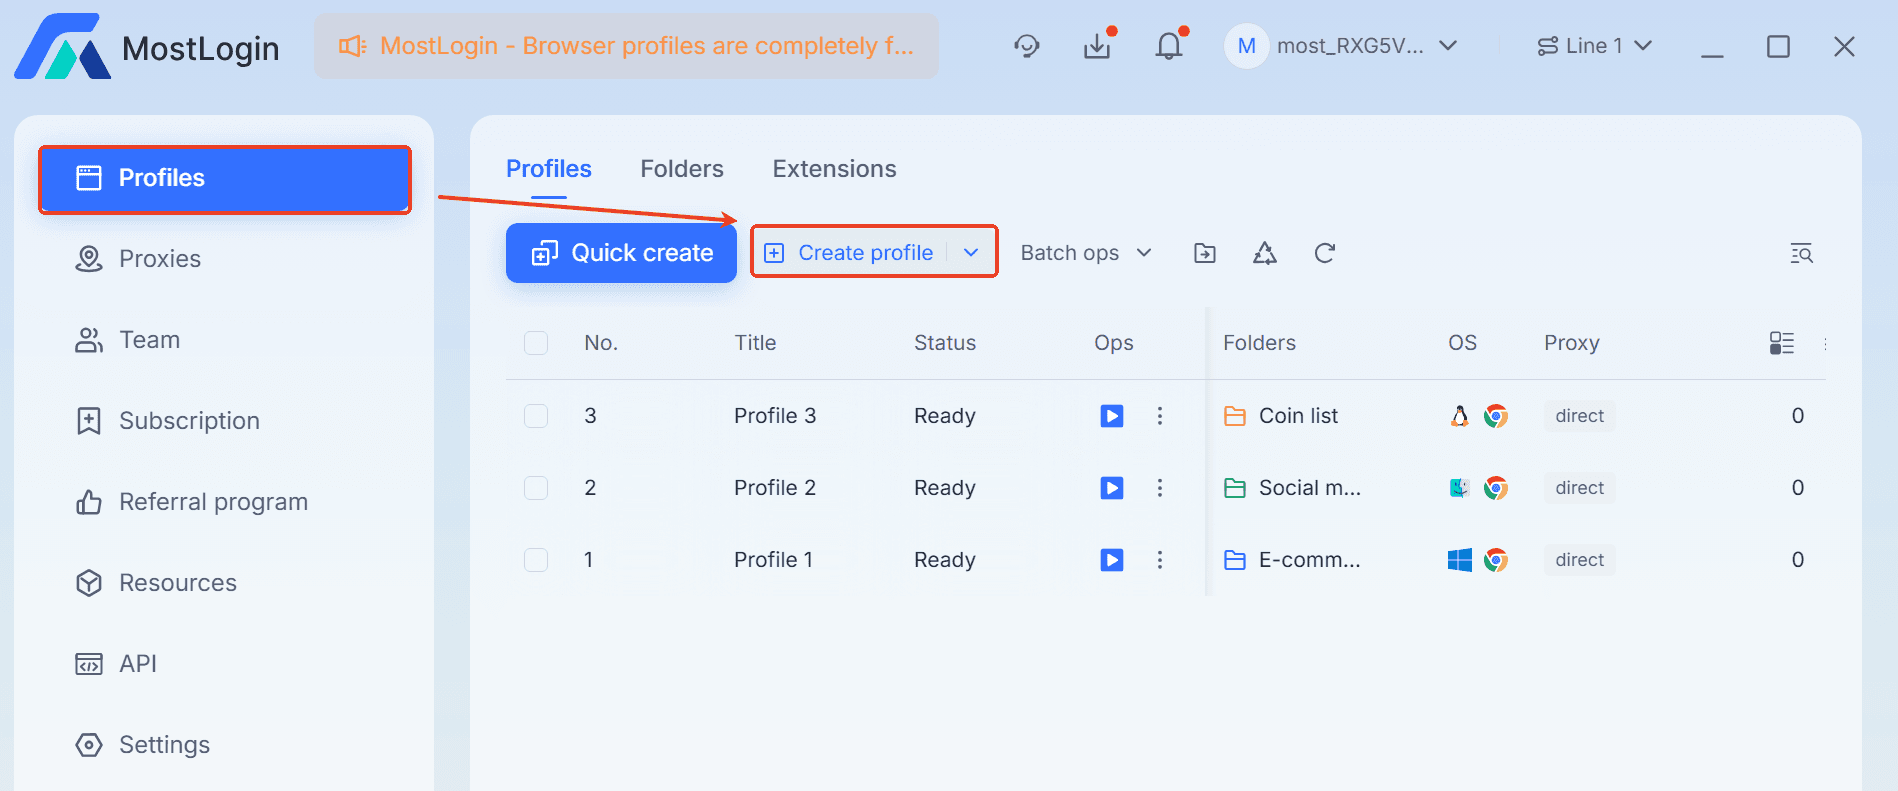

Then,Select the Proxy you just added.

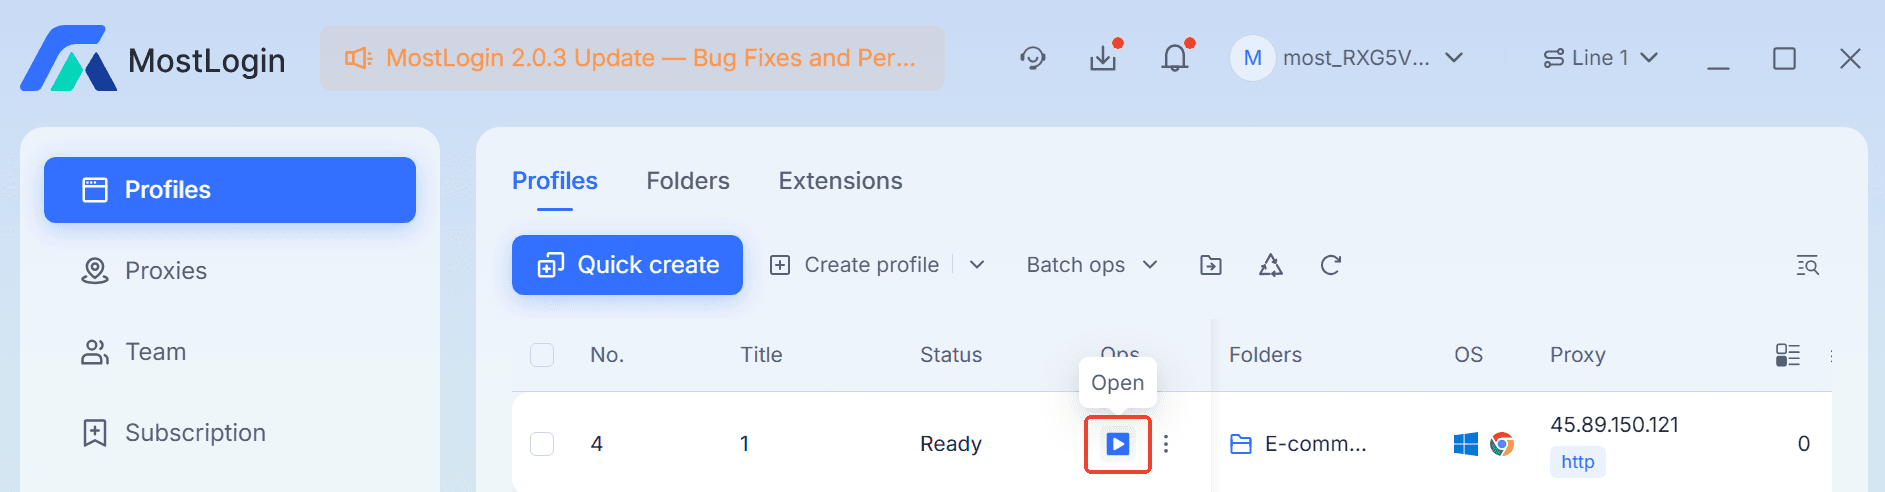
5> Configure the other profiles options,click [Confirm]. Open the newly created profiles and you're ready to run.