MostLogin is a professional anti-detect browser designed for secure multi-account management, fingerprint isolation, and ban prevention on platforms like Facebook, TikTok, and Google. IPDEEP complements this with high-quality global proxy services across 200+ regions, offering static/dynamic residential IPs, mobile proxies, and data center IPs.
Integrating IPDEEP proxies with MostLogin enables automatic IP rotation and fingerprint isolation for dual-layer protection. This tutorial will show you how to set up IP DEEP proxy into MostLogin to ensure maximum security for your accounts.
To ensure a smooth setup, please confirm the following:
IPDEEP Account: You are registered and logged into the IPDEEP Dashboard.
MostLogin Installed: You have downloaded and installed the latest version of desktop client .
Proxy Selection: For optimal anonymity, we recommend using IPDEEP Rotating Residential Proxies, which feature automatic IP rotation for enhanced security.
Network Stability: Your local internet connection is stable.
Proxy Credentials: You have generated your proxy details from the IPDEEP dashboard and have the following ready:
○ Host (Server Address)
○ Port
○ Username
○ Password
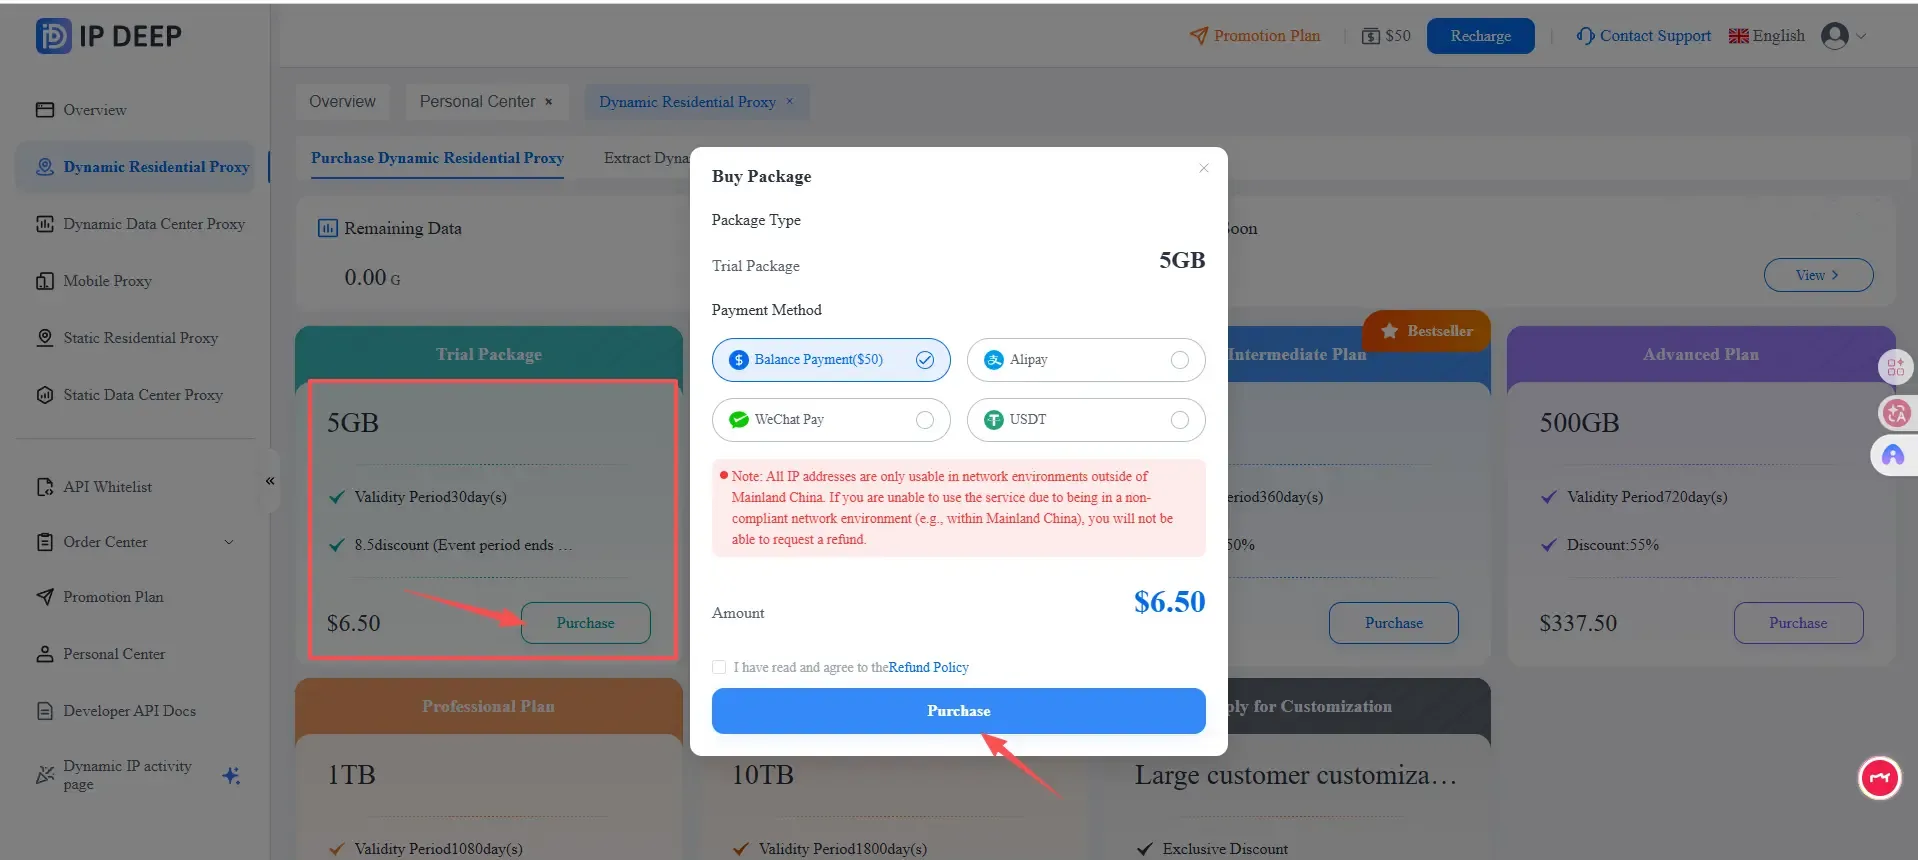
Step 1 Obtain Proxy Information from IP DEEP
Select and purchase the right proxy fit for your needs. We will take dynamic residential proxy for example.
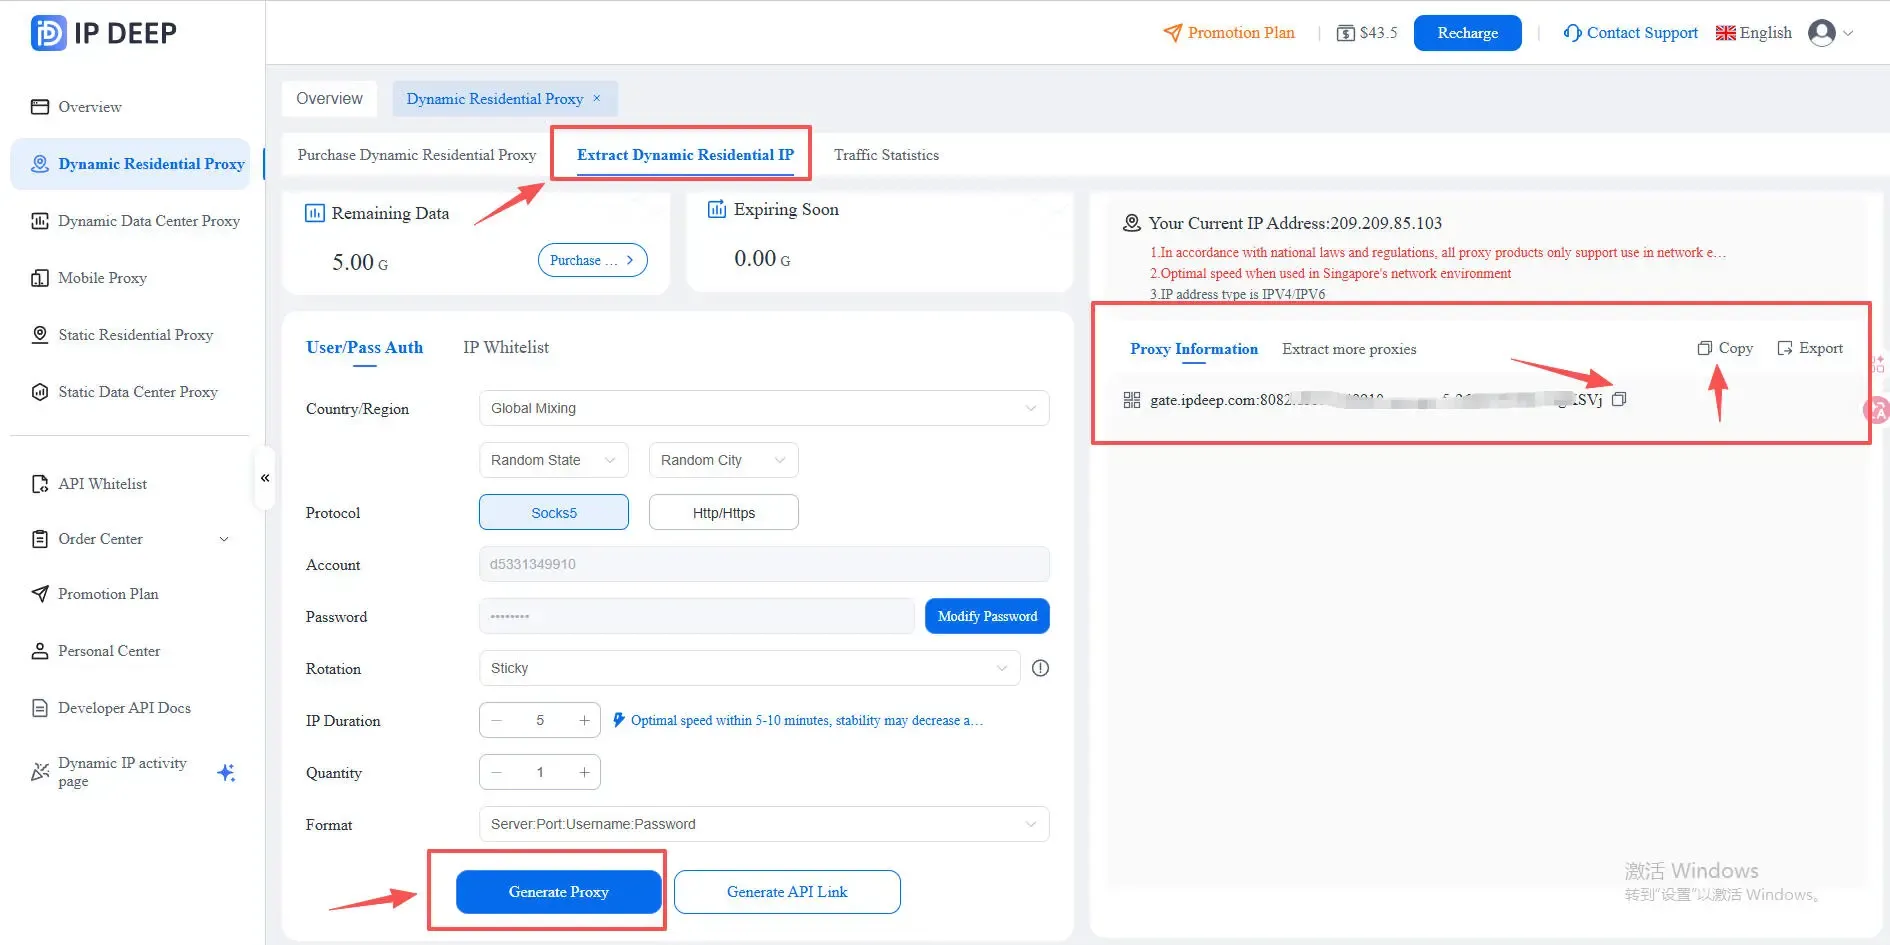
Navigate to Extract Dynamic Residential IP and generate the IP fits for your business use case. Click Generate Proxy and copy the IP.
Step 2 Add IP DEEP Proxy Information to MostLogin Antidetect Browser
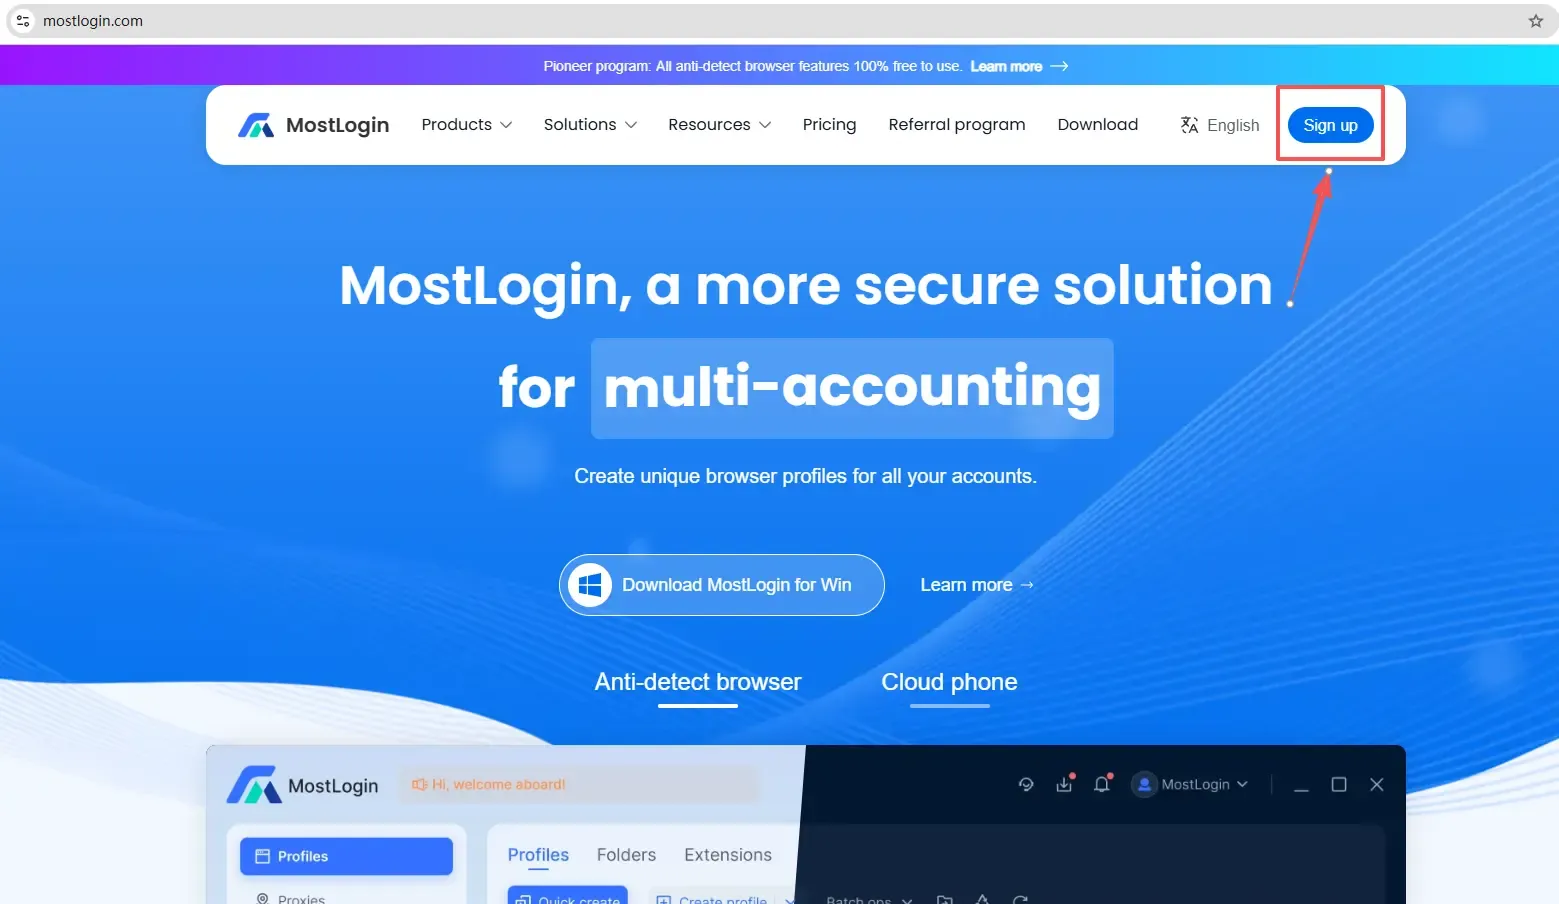
Sign Up: Go to MostLogin and download the desktop client to sign in.
Navigate to Proxies on the left navigation bar and click Add Proxy. Select the right Proxy protocol and paste the IP from IP DEEP.
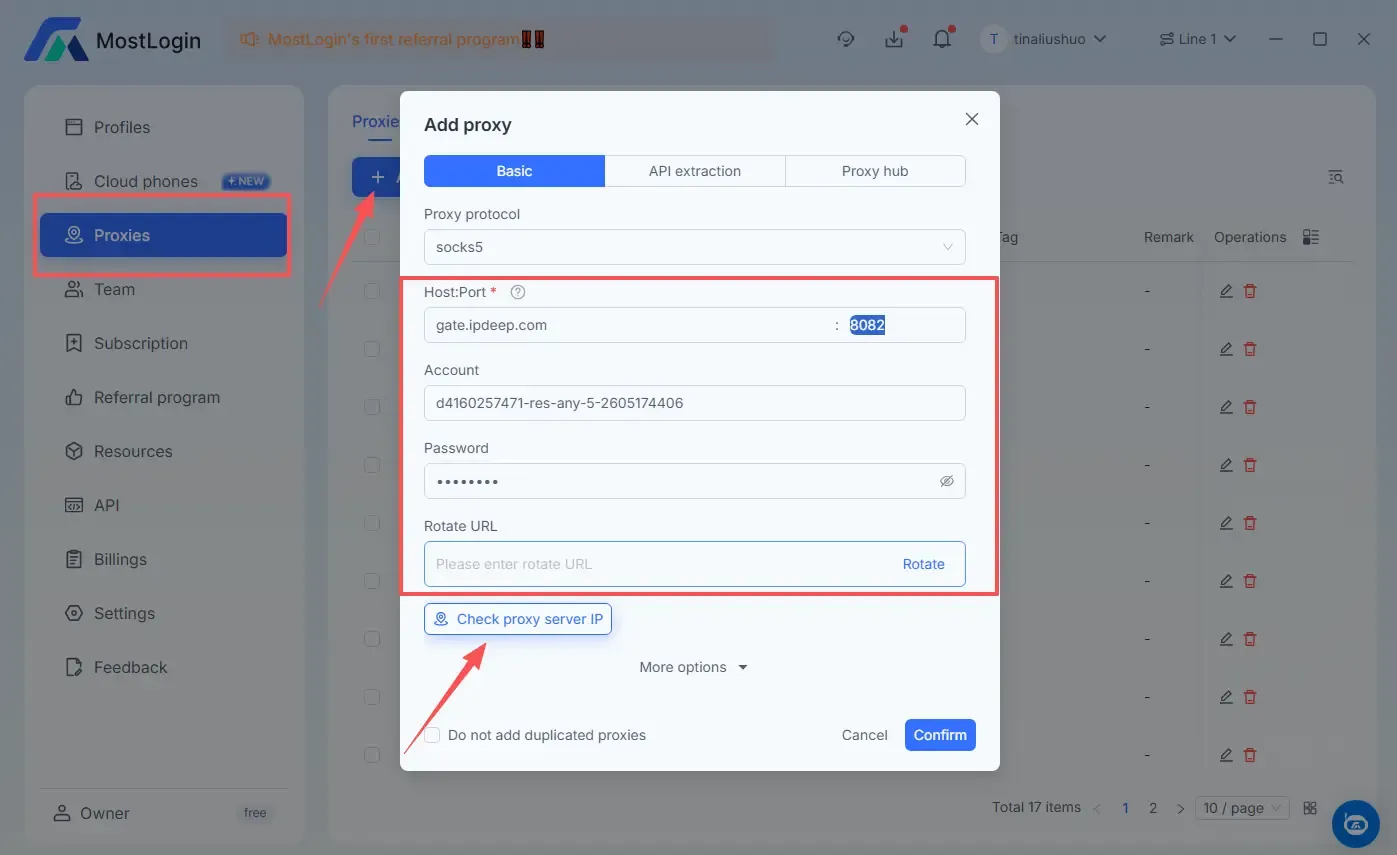
Click Check proxy server IP to see if this IP works. Then hit Confirm to add it successfully.
When you create the profile, you could choose the added IP from Create profile -- Proxy -- Added proxy for the specific profile. MostLogin will automatically sync your profile’s timezone and language to match the proxy's location.
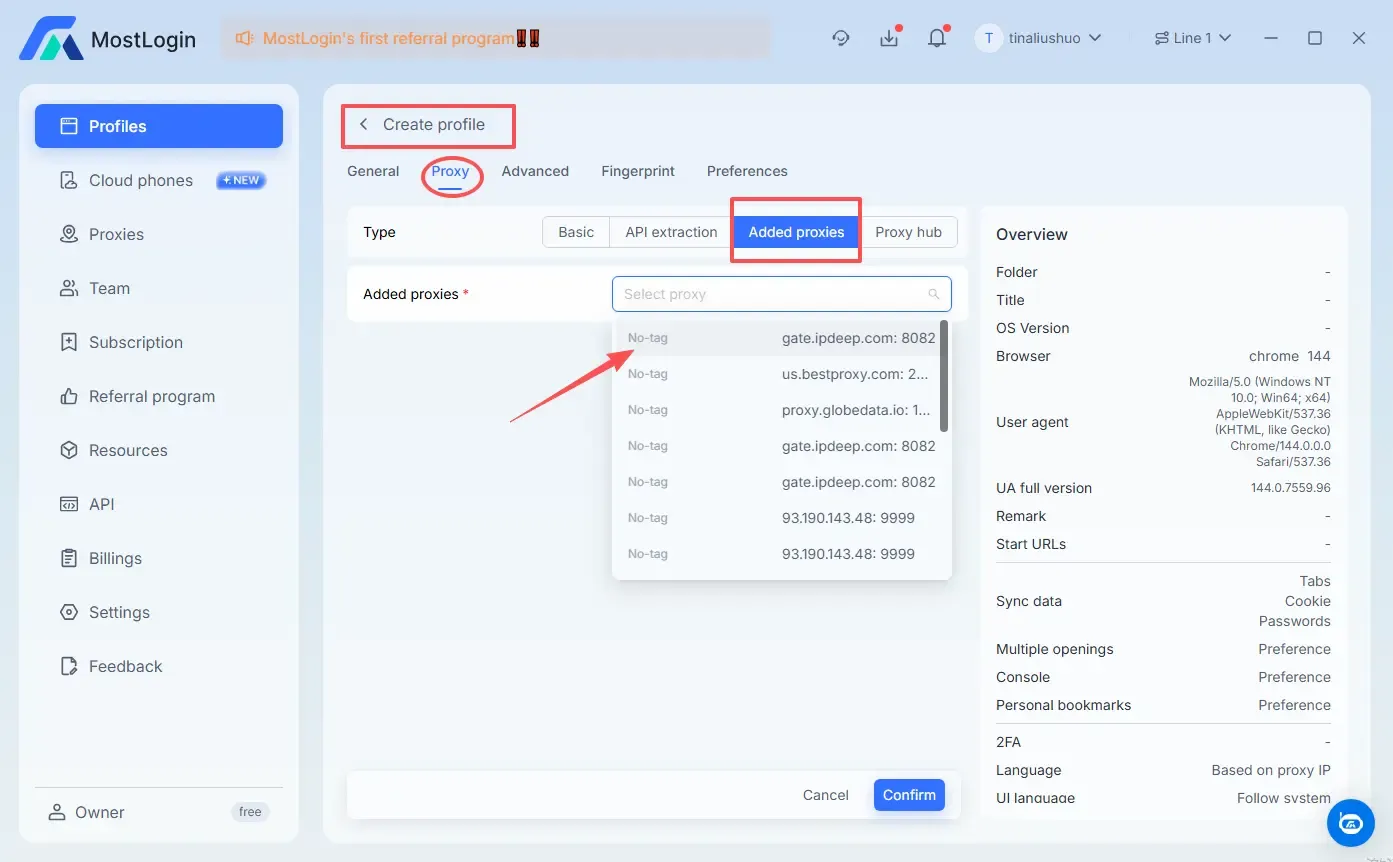
Click "Start" and you're ready to go!